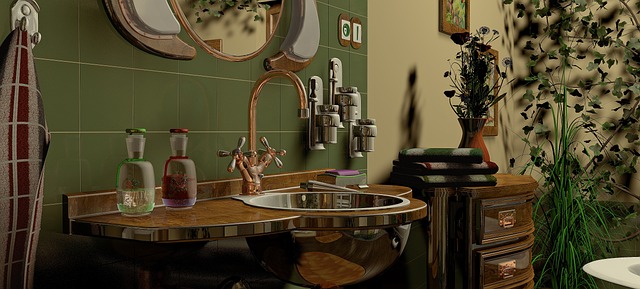
Floating vanities are a popular design choice for tiny bathroom makeovers, offering an airy and modern aesthetic by eliminating bulky base cabinets. This trend creates the illusion of space, making small bathrooms appear larger and more open. By prioritizing sleek materials like quartz countertops, neutral tones, and metallic accents, you can achieve a sophisticated and clutter-free look. Strategic planning, precise measurements, and meticulous installation are key to a successful transformation. Installing floating vanities maximizes storage while maintaining an uncluttered design, ensuring your tiny bathroom feels both stylish and functional.
Looking to give your tiny bathroom a clean, modern update? Consider installing floating vanities. This trend offers both style and practicality, maximizing space and creating an airy, open feel. In this guide, we’ll walk you through the entire process from understanding the appeal, choosing materials, measuring for installation, tools needed, styling tips – perfect for transforming your tiny bathroom into a sleek oasis.
Understanding the Appeal of Floating Vanities
In the pursuit of a clean and modern aesthetic, especially in compact spaces like tiny bathrooms, floating vanities have emerged as a popular choice. This design trend transcends traditional bathroom furniture, offering a sleek and airy ambiance that enhances visual appeal. By mounting vanities directly to walls without the need for bulky base cabinets, floating vanities create an illusion of space, making tiny bathroom makeovers appear larger and more open.
This innovative approach not only contributes to the overall contemporary look but also provides practical benefits. It allows for easier cleaning, as there are no exposed surfaces beneath the vanity. Moreover, the minimal design promotes organization, ensuring your bathroom remains clutter-free. For those seeking to transform their tiny bathroom into a stylish oasis, embracing floating vanities is a game-changer, making it simpler to achieve a sophisticated and modern look without sacrificing functionality.
Choosing the Right Materials and Design
When considering a tiny bathroom makeover, especially with floating vanities, material and design choices are paramount for achieving that clean, modern look. Opting for sleek, durable materials like quartz or solid surface countertops not only adds to the aesthetic appeal but also ensures longevity in a space prone to moisture. For a subtle yet sophisticated touch, choose neutral tones paired with metallic accents – brass fixtures or silver hardware can instantly elevate the design without overpowering the small space.
Remember that less is more in a tiny bathroom. Clean lines and minimalist designs create an illusion of space. Custom-built floating vanities, tailored to fit the exact dimensions of your bathroom, maximize storage potential while maintaining a clutter-free appearance. Incorporate open shelving for a modern aesthetic, but be mindful of keeping essential items organized to maintain that pristine, uncluttered look.
Measuring and Planning for Installation
Measuring and planning are crucial steps in achieving a clean and modern look with floating vanities, especially for those tackling a tiny bathroom makeover. Start by taking precise measurements of the available space—including width, depth, and height—to ensure the vanity fits perfectly. Consider the size of your sink and any additional storage units you might need, like a medicine cabinet or shelves, to maximize functionality within the limited area.
Create a detailed plan that visualizes how the vanity will sit in the room. Measure and mark the desired position to ensure it aligns with your overall design aesthetic. This careful planning will not only guarantee a flawless installation but also help create an inviting, organized, and stylish tiny bathroom space.
Tools and Techniques for a Successful Makeover
Installing floating vanities is a fantastic way to achieve a sleek, contemporary look in your tiny bathroom makeover. The key to success lies in the right tools and techniques. Start by gathering essential items like level, measuring tape, stud finder, drill, screwdriver, and a saw for cutting the vanity to size. Ensure precise measurements to avoid unnecessary cuts or mistakes.
Use a level to check the wall’s evenness before mounting the vanity, ensuring it sits flush. For floating vanities, pilot holes are crucial to prevent damage to your walls. A stud finder helps locate structural supports, enabling secure attachment. With the right tools in hand, you’re ready to transform your tiny space into a modern oasis.
Styling Tips for Your Tiny Bathroom
When working with a tiny bathroom, every inch counts. To maximize space and achieve that coveted clean and modern look, consider installing floating vanities. These sleek, wall-mounted units offer both aesthetic appeal and practical benefits, such as added storage underneath. For an enhanced sense of openness, opt for lighter colors and mirror finishes.
Complement your new vanity with strategically placed accessories—a stylish, hanging towel rack or a set of open shelves for extra storage can make the most of available wall space. Incorporate subtle textures through textiles like linen or cotton to add depth without overwhelming the small area. Remember, in a tiny bathroom makeover, less is often more.
Installing floating vanities is an excellent way to achieve a sleek, modern aesthetic in your tiny bathroom makeover. By mounting the vanity directly on the wall, you create an air of sophistication and open up valuable space. With careful planning, choosing the right materials, and following expert installation techniques, you can transform your small bathroom into a stylish oasis. Embrace minimalism, play with lighting, and select accessories that complement the clean lines of your floating vanity for a harmonious and inviting space.